How I used Paystack with Laravel
And also detailed steps on you can used it too.


Sometimes, clients have to process payments on their website, be it E-commerce or whatever the case may be. In my case, I used Paystack.
Paystack is a Nigerian financial technology (fintech) company that provides online payment processing services. It offers a secure and convenient platform that enables businesses and individuals to accept payments from customers using various payment methods such as debit cards, credit cards, and bank transfers. That's cool, right?
Let's embark on an exciting journey of using Paystack with Laravel. I will assume you have your Laravel development environment all set up and ready. So let's start right away.
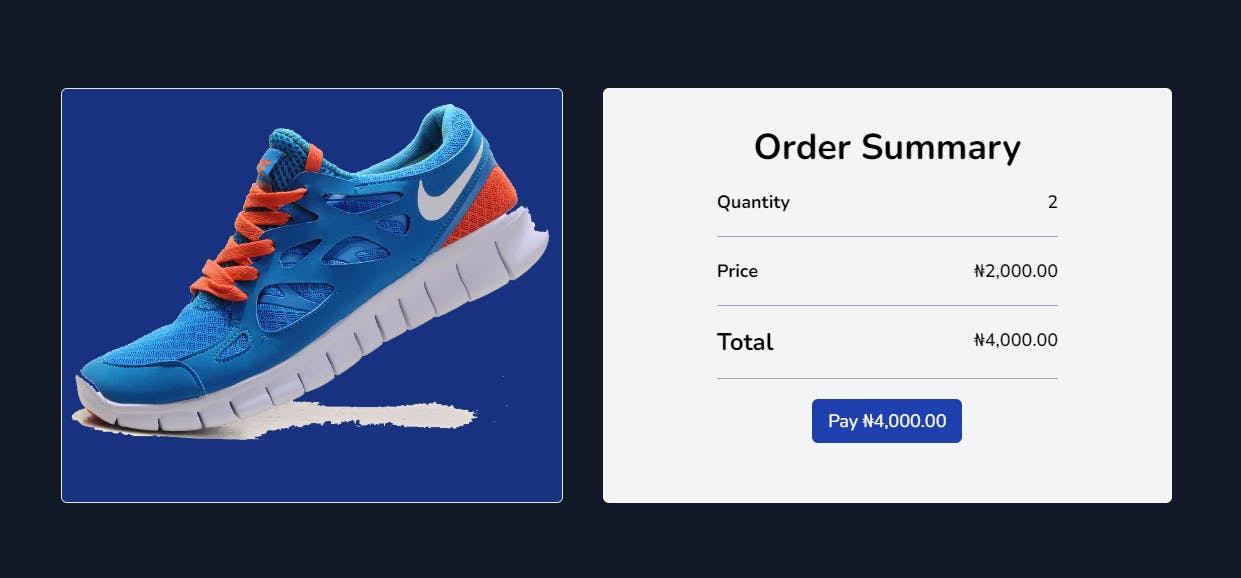
Firstly, we are going to design a simple checkout page, for a product using TailwindCSS, directing our form request to a route, pay (We will touch on this later in this article).
<body class="antialiased bg-gray-900">
<div class="pt-28">
<div class="flex flex-col md:flex-row mx-auto w-5/6 gap-10">
<div class="bg-blue-700 rounded-md bg-clip-padding backdrop-filter backdrop-blur-2xl border bg-opacity-50">
<img src="https://freepngimg.com/thumb/shoes/27428-5-nike-shoes-transparent-background.png" alt="A shoe" width="500">
</div>
<div class="bg-gray-100 w-1/2 rounded-md">
<form method="POST" action="{{ route('pay') }}" class="w-3/5 mx-auto py-10 text-lg">
@csrf
<h1 class="text-4xl font-bold text-center">Order Summary</h1>
<ul>
<li class="flex justify-between py-5 border-b border-gray-400">
<span class="font-bold">Quantity</span>
<span class="font-semibold">2</span>
</li>
<li class="flex justify-between py-5 border-b border-gray-400">
<span class="font-bold">Price</span>
<span class="font-semibold">₦2,000.00</span>
</li>
<li class="flex justify-between py-5 border-b border-gray-400">
<span class="text-2xl font-bold">Total</span>
<span class="font-semibold">₦4,000.00</span>
</li>
<li class="flex justify-center py-5">
<button type="submit" class="bg-blue-800 py-2 px-4 rounded-md text-white">
Pay ₦4,000.00
</button>
</li>
<input type="hidden" name="email"value="email.email.com">
<input type="hidden" name="amount" value="4000">
</ul>
</form>
</div>
</div>
</div>
</body>
We then proceed to the next step, which is checking out. To do this, we use a package by @iamolayemi on GitHub. Here is a detailed step on how to install the package on your project. Installation takes a few minutes.
Using Laravel 10 at the time of writing this article, an error will surface when you try installing the package.
Could not find a version of package iamolayemi/laravel-paystack matching your minimum-stability (stable). Require it with an explicit version constraint allowing its desired stability.
To solve this error, run this instead on your terminal to install the package:
$composer require iamolayemi/laravel-paystack:dev-master
After successfully installing the package and adding the public and secret keys you get from Paystack in your .env file, we then define two route endpoints in the web.php file.
<?php
use Illuminate\Support\Facades\Route;
use App\Http\Controllers\PaymentController;

Route::controller(PaymentController::class)->group(function() {

    // The route that the pay button calls to initialize payment
    Route::post('/paystack/initialize', 'initialize')->name('pay');

    // The callback url after a payment
    Route::get('/paystack/callback', 'callback')->name('callback');
});
The first route endpoint initializes payment; Our pay button calls to this route. The second route generates a callback URL when a payment has been processed.
When a user clicks the pay button, it directs the user to the initialize method in the PaymentController.
<?php

namespace App\Http\Controllers;

use Illuminate\Http\Request;
use Iamolayemi\Paystack\Facades\Paystack;

class PaymentController extends Controller
{
    public function initialize()
    {
        // Generate a unique payment reference
        $reference = Paystack::generateReference();

        // prepare payment details from form request
        $paymentDetails = [
            'email' => request('email'),
            'amount' => request('amount'),
            'reference' => $reference,
            'callback_url' =>  route('callback')
        ];

        // initialize new payment and get the response from the api call.
        $response = Paystack::transaction()
            ->initialize($paymentDetails)->response();

        if (!$response['status']) {
            // notify that something went wrong
        }

        // redirect to authorization url
        return redirect($response['data']['authorization_url']);
    }
}
Let's go through the line of codes in the initialize method:
First, we generate a unique reference number. Our payment requires this unique reference number to be successfully processed.
// Generate a unique payment reference
$reference = Paystack::generateReference();
Next, we pass these compulsory details below into an array named paymentDetails:
Form requests (In our case, email and amount): The amount should be in kobo ie multiplying the amount by 100.
The unique reference number
The callback URL, which is the callback route in our case.
          // prepare payment details from form request
          $paymentDetails = [
              'email' => request('email'),
              'amount' => request('amount') * 100,
              'reference' => $reference,
              'callback_url' =>  route('callback')
          ];
We can also pass optional details like:
metadata: An array of optional data you need.
In this article, I want to have access to optional data when the transaction is successful and send these data into the database. For this, I will use the metadata key to store these data.
  $paymentDetails = [
              'email' => request('email'),
              'amount' => request('amount') * 100,
              'reference' => $reference,
              'callback_url' =>  route('callback'),
              'metadata' => [
                  'role' => 'Laravel Developer',
                  'twitter' => '@danieldunu',
                  'you' => 'should follow me'
              ]
          ];
In the next line of code, we then initialize a new payment and get our response from the API call.
// initialize new payment and get the response from the api call.
        $response = Paystack::transaction()
            ->initialize($paymentDetails)->response();
We can see the content of the response by using the dump and die function on the variable response,
// initialize new payment and get the response from the api call.
        $response = Paystack::transaction()
            ->initialize($paymentDetails)->response();

        dd($response);
The results of the JSON response after using the dump and die function on the variable response variable contain the following items:
status
message
data (If no error occurred in the process)
If there is no error in the response,
Paystack creates an authorization URL after you have passed the necessary parameters with no errors.
The key, status, returns a value, true and the key, message, returns the value, "Authorization URL created".
A third key, data, is also present in the JSON response that returns an array of values, which among others, contains the authorization URL.

If there is an error in the response,
It only returns two keys, status and message.
The key, status returns false and the key, message, returns the error message.
The error message can be,
"Invalid key": if you didn't input your public and secret keys in the .env file.
"Invalid Email Address Passed": if you input the wrong email format and many others.

We proceed to remove the dump and die function and go over to the next statement of code.
If the status response doesn't return true, you can write your desired conditions inside the if statement below to notify something went wrong.
 // initialize new payment and get the response from the api call.
        $response = Paystack::transaction()
            ->initialize($paymentDetails)->response();

        if (!$response['status']) {
            // notify that something went wrong
        }
If the status response returns true, it skips the if statement and proceeds to the next line of code. This code redirects us to the authorization URL earlier generated for us by Paystack.
// redirect to authorization url
        return redirect($response['data']['authorization_url']);
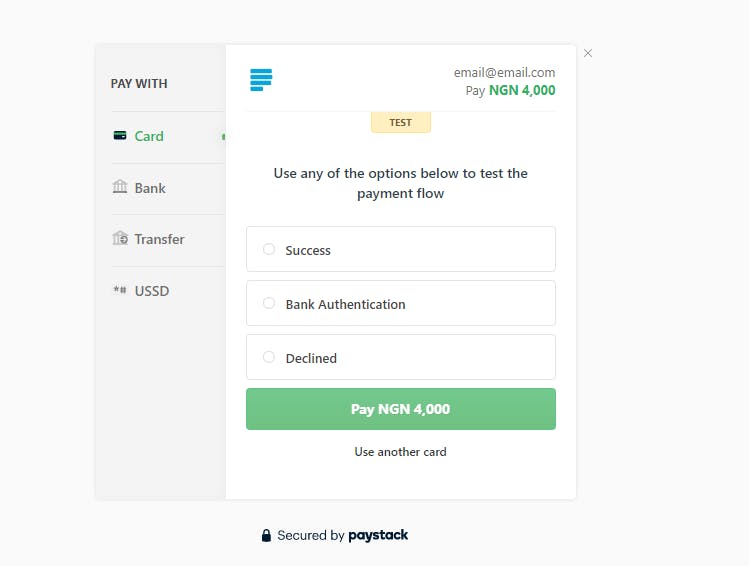
A page that looks like this image below, appears prompting us to make payments. This page is for developing/testing purposes.
You have successfully reached this stage. You should give yourself some accolades.
After payment is made, we need to confirm if it's successful or not. Either way, we need to write some logic. That's where the callback method comes in. The callback method also returns all necessary values useful in our logic.
This is the complete PaymentController from Iamolayemi package.
<?php

namespace App\Http\Controllers;

use Illuminate\Http\Request;
use Iamolayemi\Paystack\Facades\Paystack;

class PaymentController extends Controller
{
    public function initialize()
    {
        // Generate a unique payment reference
        $reference = Paystack::generateReference();

        // prepare payment details from form request
        $paymentDetails = [
            'email' => request('email'),
            'amount' => request('amount') * 100,
            'reference' => $reference,
            'callback_url' =>  route('callback'),
            'metadata' => [
                'role' => 'Laravel Developer',
                'twitter' => '@danieldunu',
                'you' => 'should follow me'
            ]
        ];

        // initialize new payment and get the response from the api call.
        $response = Paystack::transaction()
            ->initialize($paymentDetails)->response();


        if (!$response['status']) {
            // notify that something went wrong
        }

        // redirect to authorization url
        return redirect($response['data']['authorization_url']);
    }
    // Callback method---------------------------------------------
    public function callback()
    {
        // get reference  from request
        $reference = request('reference') ?? request('trxref');

        // verify payment details
        $payment = Paystack::transaction()->verify($reference)->response('data');

        // check payment status
        if ($payment['status'] == 'success') {
            // payment is successful
            // code your business logic here
        } else {
            // payment is not successful
        }
    }
}
To confirm if the payment is successful, the status value must be, success. If we dump and die the response ($payment), we can see all the data returned to us from Paystack.
 // verify payment details
        $payment = Paystack::transaction()->verify($reference)->response('data');

    dd($payment);
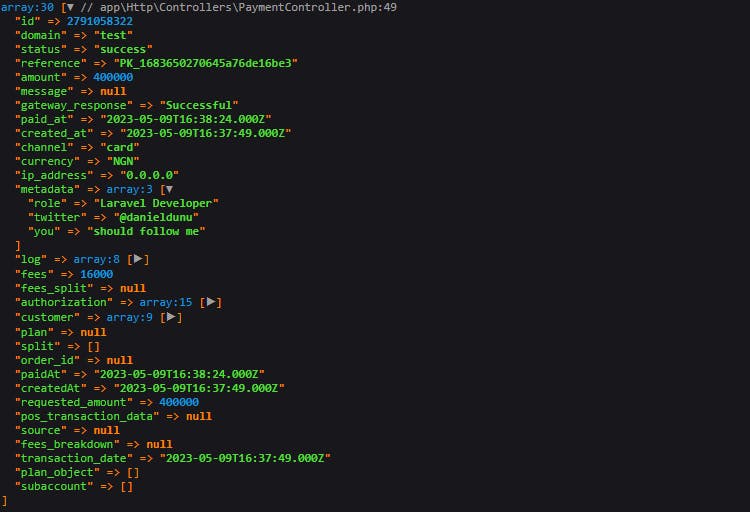
We now have access to important data that might be useful. The IP address key returned a correct value, but I had to use the inspect element to clear it out for security purposes.
You can see the status, amount, fees, customer (which contains details about the customer in an array), our additional data in the metadata key (as an array of values) and many others.
Let's store some of these data in the database. We will make use of the if condition in the callback method.
// check payment status
        if ($payment['status'] == 'success') {
            Transaction::create([
                'amount' => $payment['amount']/100, // convert to naira
                'status' => $payment['status'],
                'role' => $payment['metadata']['role'],
                'twitter' => $payment['metadata']['twitter'],
                'you' => $payment['metadata']['you']
            ]);

            return redirect()->back()->with('message', 'Payment Successful');
        } else {
            // payment is not successful
            return redirect()->back()->with('message', 'Payment not Successful');
        }
Conclusion
This is a well-detailed step-by-step explanation of how you can integrate Paystack into your Laravel Project. Let me know in the comment section if you encounter any errors.